15 DIY Christmas Decorations for a Handmade Holiday

Introduction
Ever wished your tree had a few decorations with real meaning behind them? That’s exactly what handmade holiday decor offers. If you’re looking for diy christmas decorations that feel personal, budget-friendly, and genuinely doable, you’re in the right place. In my experience, the ornaments people treasure most aren’t the ones bought off a shelf, they’re the ones made by hand, even if a little imperfect. This roundup of 15 ideas covers everything from salt dough ornaments to dried orange garland, each one simple enough for beginners yet charming enough to become a lasting tradition. Whether you’re crafting alone or with kids, you’ll find something here worth making today.
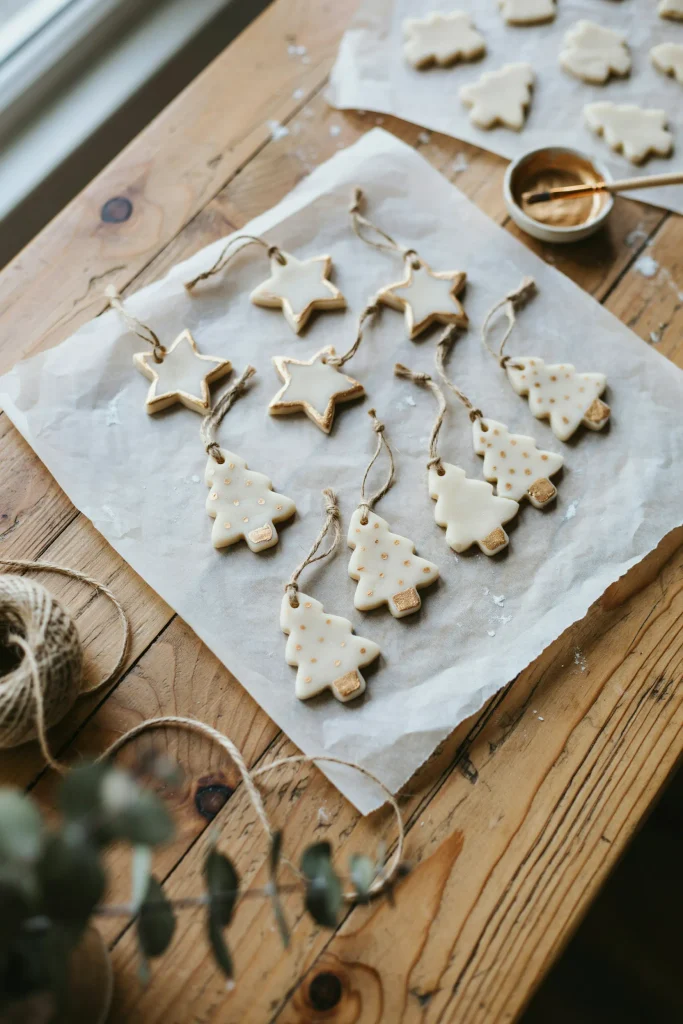
1. Salt Dough Ornaments
What You’ll Need
- 2 cups flour
- 1 cup salt
- 1 cup warm water
- Rolling pin and cookie cutters
- Straw or skewer for holes
- Acrylic paint and twine
How to Make It
- Mix flour, salt, and water into a firm dough.
- Roll dough to about ¼-inch thickness.
- Cut shapes using cookie cutters.
- Poke a hole near the top with a straw for hanging.
- Bake at 200°F for 2-3 hours until fully hardened.
- Let cool, then paint and add a twine loop once dry.
Salt dough ornaments are one of the most beginner-friendly diy christmas decorations you can make, using ingredients almost every kitchen already has. In my experience, this project works especially well with kids, since shaping and cutting the dough feels more like play than actual crafting. The plain, matte texture of baked salt dough takes paint beautifully, letting you customize colors to match any tree theme. Because these ornaments are lightweight and inexpensive, they’re easy to make in bulk for gifting or filling out a sparse tree. They also store flat, making them simple to keep year after year.
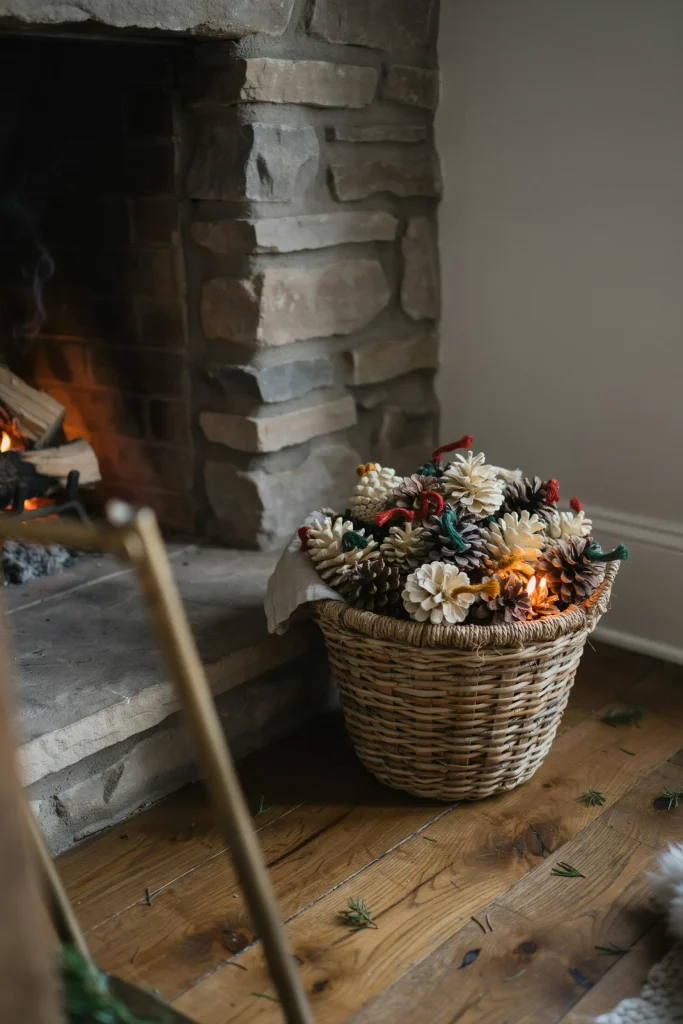
2. Pinecone Fire Starters
What You’ll Need
- Dry pinecones
- Wax (candle stubs or wax flakes work)
- Double boiler or microwave-safe bowl
- Wick or cotton string
- Wax paper for drying
How to Make It
- Tie a length of wick or string around each pinecone.
- Melt wax slowly using a double boiler.
- Dip each pinecone fully into the melted wax.
- Let excess wax drip off, then place on wax paper to set.
- Repeat dipping once more for a thicker coating if desired.
- Once fully cooled, store in a basket near the fireplace.
Pinecone fire starters are a genuinely useful addition to any list of diy christmas decorations, since they combine holiday charm with real function. I’ve tried these during colder months, and they consistently make starting a fire faster and easier than kindling alone. Displayed in a rustic basket, they also double as a cozy, textured decoration even before they’re ever used. This project works well with pinecones gathered outdoors for free, making it one of the more budget-friendly ideas on this list. Because they’re both decorative and practical, they also make thoughtful, low-cost handmade gifts for neighbors or family.
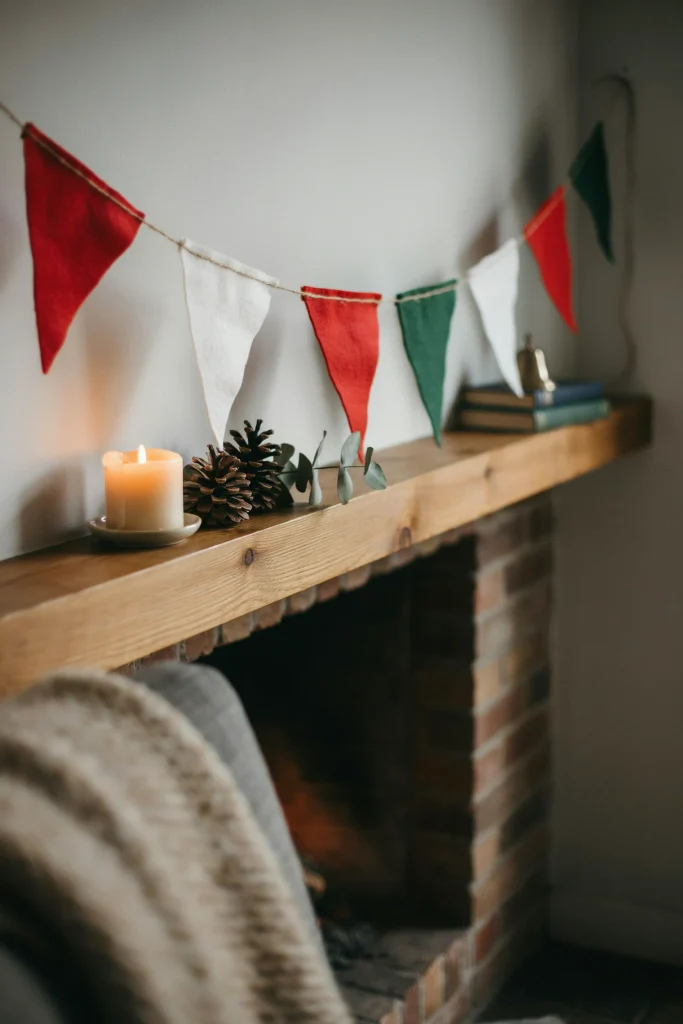
3. Felt Garland Banner
What You’ll Need
- Felt sheets in 3 colors
- Scissors or fabric shears
- Twine or ribbon
- Hot glue gun
- Fabric marker or chalk
How to Make It
- Cut a triangle template from cardstock.
- Trace and cut triangles from each felt color.
- Fold the top edge of each triangle over the twine.
- Secure each fold with a small dab of hot glue.
- Space triangles evenly along the twine as you go.
- Hang the finished garland along a mantel, wall, or window.
A felt garland banner is one of the more versatile diy christmas decorations, since the color palette and length can be adjusted to fit any space. I’ve noticed that felt holds its shape far better than paper, making this a decoration that can be reused for many seasons without fraying or tearing. This project comes together quickly once the triangles are cut, since the assembly itself only takes a few minutes with a hot glue gun. It works beautifully draped along a mantel, staircase, or window, adding color and texture without much cost or effort. Because felt doesn’t wrinkle easily, it also stores flat and compactly between holidays.
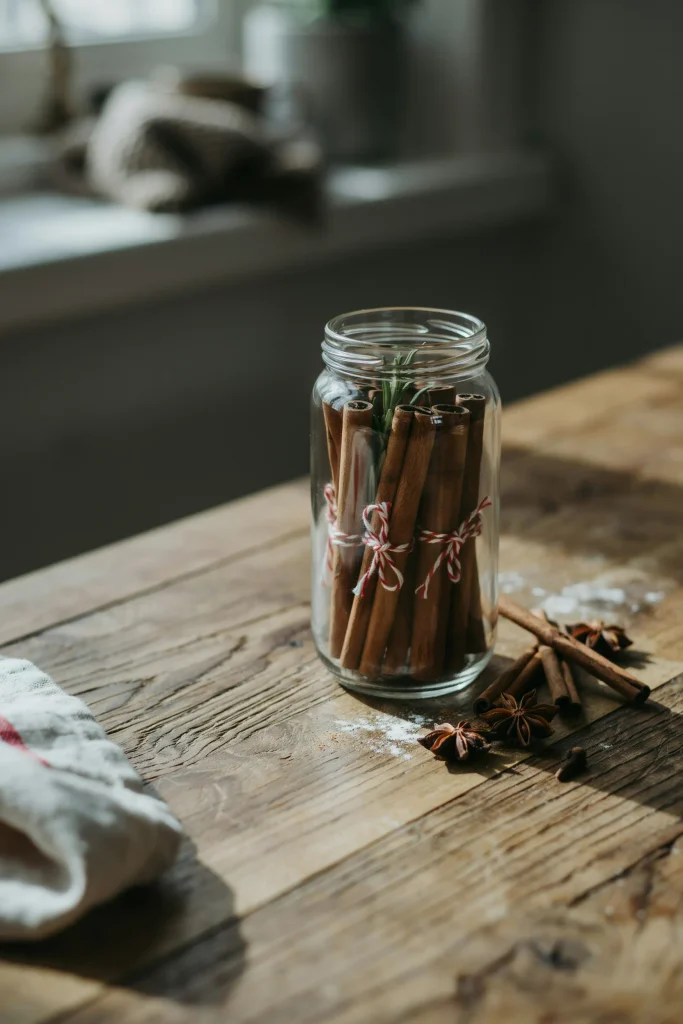
4. Cinnamon Stick Bundles
What You’ll Need
- Cinnamon sticks (5-6 per bundle)
- Twine or thin ribbon
- Scissors
- Optional: small pinecone or berry sprig
How to Make It
- Gather 5-6 cinnamon sticks into a small bundle.
- Wrap twine tightly around the middle of the bundle.
- Tie a secure knot, leaving a loop for hanging if desired.
- Trim excess twine ends neatly.
- Tuck in a small pinecone or berry sprig for extra detail.
- Display in a jar, basket, or hang directly on the tree.
Cinnamon stick bundles are one of the simplest diy christmas decorations to make, requiring only a few inexpensive ingredients from the grocery store. I’ve noticed that guests often comment on the natural scent before they even notice the decoration itself, which adds an extra sensory layer most handmade crafts don’t offer. This project takes only a few minutes per bundle, making it easy to create several at once for both display and gifting. They work beautifully in a glass jar on a console table or tied directly onto a tree branch. Because cinnamon dries naturally over time, these bundles need no special storage or maintenance.
5. Painted Mason Jar Lanterns
What You’ll Need
- Mason jars
- White or frosted glass paint
- Paintbrush or sponge
- Battery-operated LED candles
- Optional: ribbon or twine for the neck
How to Make It
- Clean and dry each mason jar thoroughly.
- Apply frosted glass paint in a light, even layer.
- Add texture using a sponge for a snowy effect if desired.
- Let dry completely for at least 2-3 hours.
- Tie ribbon or twine around the jar’s neck.
- Place an LED candle inside and set on a windowsill or table.
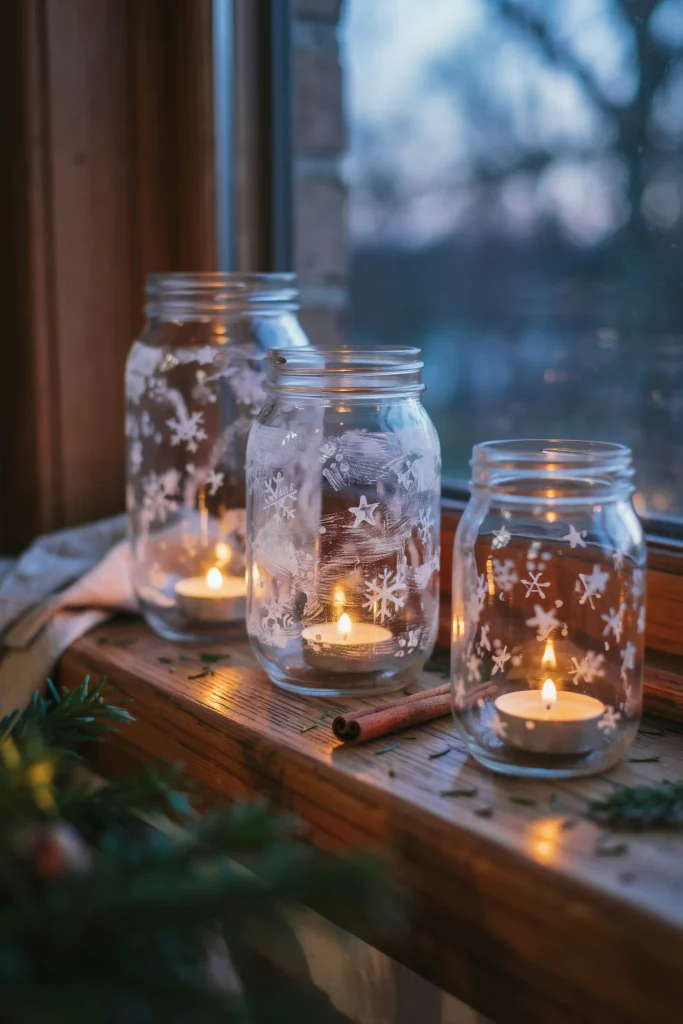
Painted mason jar lanterns are one of the most rewarding diy christmas decorations because the transformation from plain glass to frosted glow is so dramatic. In my experience, using a sponge rather than a brush creates a more natural, snow-like texture that catches candlelight beautifully once the sun sets. This project is budget-friendly since most households already have spare mason jars sitting in a cupboard somewhere. Battery-operated candles make this a safe option for windowsills or tables near foot traffic. Once the season ends, these same jars can easily be repainted or repurposed for everyday use throughout the year.
Want to bring that same handmade charm to your front door? Check out 15 Christmas Entryway Decor Ideas for a Warm Welcome for more cozy holiday inspiration.
6. Paper Star Ornaments

What You’ll Need
- Cardstock or origami paper
- Ruler and scissors
- Glue stick
- Thin ribbon or string for hanging
How to Make It
- Cut five equal-sized paper strips.
- Fold and interlock the strips following a simple star-weaving pattern.
- Tuck loose ends into the folds to secure the shape.
- Adjust the folds gently to form a rounded 3D star.
- Attach a small loop of ribbon for hanging.
- Repeat with different paper colors for variety.
Paper star ornaments bring an elegant, understated look to a tree, especially compared to typical glossy, store-bought pieces. I’ve tried this fold-and-weave technique with both kids and adults, and while it takes a bit of practice at first, the result consistently looks far more polished than the effort suggests. This is one of the more visually striking diy christmas decorations on this list, since the folded paper catches light in a way flat ornaments simply can’t. White and gold cardstock creates a soft, neutral look, while brighter colors work well for a more playful tree theme. Because paper is lightweight, these stars are safe even on delicate branch tips.
7. Dried Orange Slice Garland
What You’ll Need
- Oranges, thinly sliced
- Baking sheet and parchment paper
- Oven or dehydrator
- Twine or string
- Needle (optional, for threading)
How to Make It
- Slice oranges into thin, even rounds.
- Pat slices dry with a paper towel.
- Arrange on a parchment-lined baking sheet.
- Bake at 200°F for 2-3 hours, flipping halfway through.
- Let slices cool and fully dry overnight.
- Thread twine through each slice to form a garland.
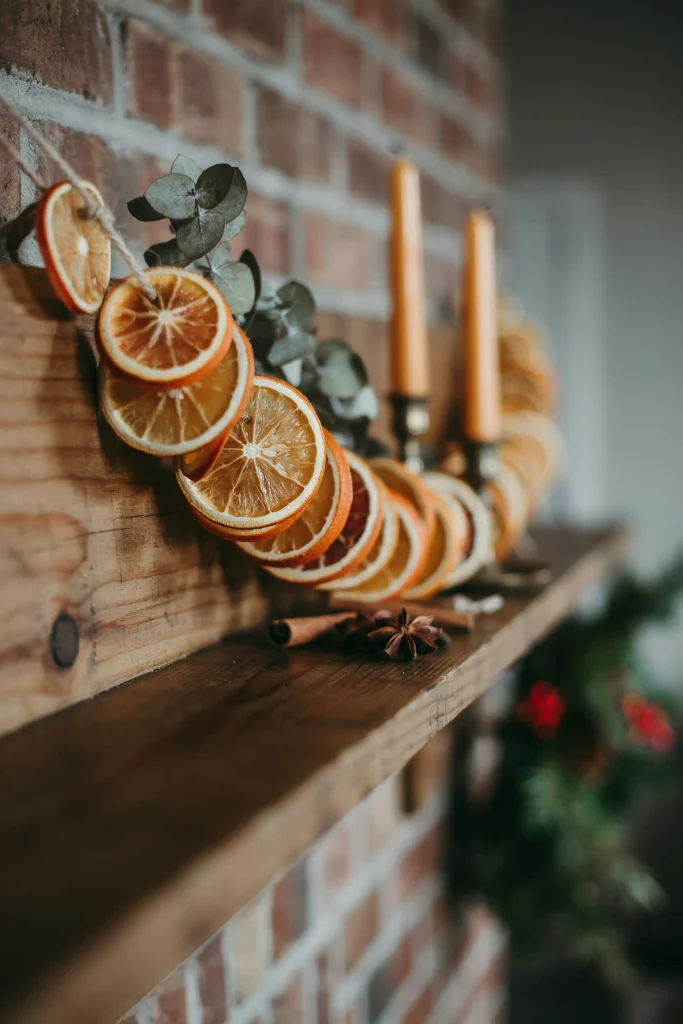
A dried orange slice garland is one of the more fragrant diy christmas decorations, filling a room with a warm citrus scent as it bakes and even after it’s hung. That’s why many designers recommend this project for anyone wanting natural, sustainable decor instead of plastic garland. I’ve noticed that slightly thicker slices hold their shape better during drying than very thin ones, which can become too brittle to thread. This garland works beautifully draped along a mantel, staircase, or wrapped around a tree for added texture. Because the oranges are fully dried, the garland lasts the entire season without spoiling or attracting pests.
8. Yarn Wrapped Wreath
What You’ll Need
- Foam or straw wreath base
- Chunky yarn in 2-3 colors
- Scissors
- Hot glue gun
- Ribbon for hanging
How to Make It
- Secure the end of the yarn to the wreath base with a dab of glue.
- Wrap yarn tightly and evenly around the entire base.
- Switch colors periodically, gluing ends as you transition.
- Continue wrapping until the base is fully covered.
- Secure the final end with glue and trim excess yarn.
- Attach a ribbon loop at the top for hanging.
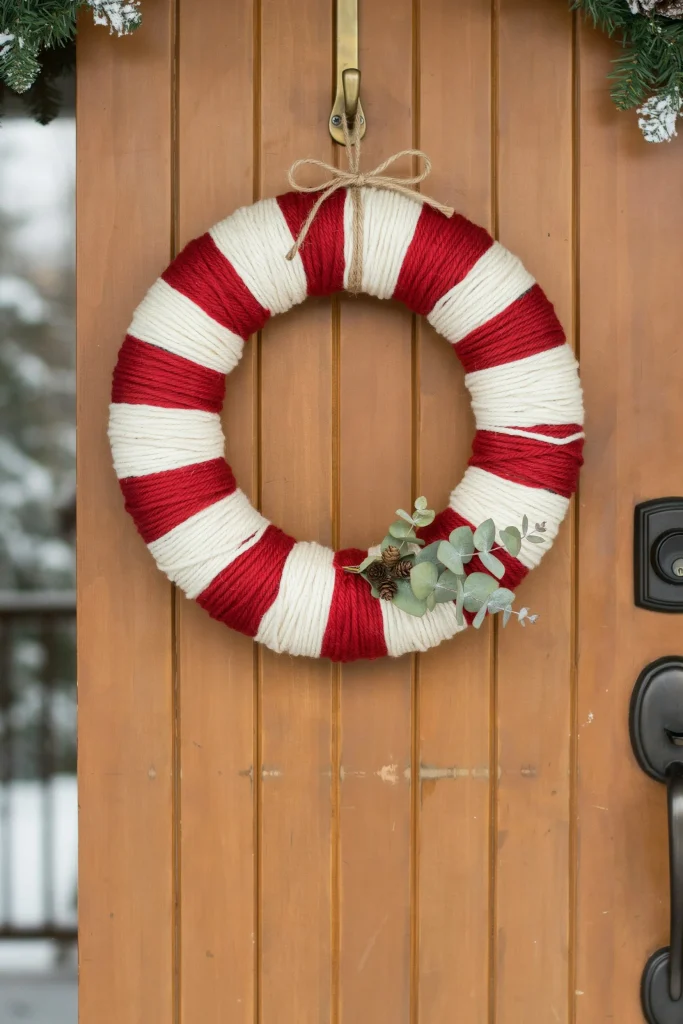
A yarn-wrapped wreath is a cozy, texture-forward take on diy christmas decorations that feels distinctly different from typical pine or plastic wreaths. I’ve tried this project using leftover yarn from other craft projects, and it’s a great way to use up scraps that would otherwise go unused. The wrapping process itself is simple and repetitive, making it a relaxing activity to do while watching a movie or listening to music. Mixing two or three colors adds visual interest without requiring any special skill or technique. Because the yarn fully covers the base, this wreath also holds up well against wind and light rain if hung outdoors.
9. Popsicle Stick Ornaments
What You’ll Need
- Popsicle sticks (5 per ornament)
- Hot glue gun
- Acrylic paint
- Small paintbrush
- Ribbon or string for hanging
How to Make It
- Arrange 5 popsicle sticks into a star shape.
- Glue each overlapping point together to secure the shape.
- Let the glue dry completely before handling.
- Paint both sides in your chosen color.
- Let paint dry, then add glitter or details if desired.
- Glue a small ribbon loop to the back for hanging.
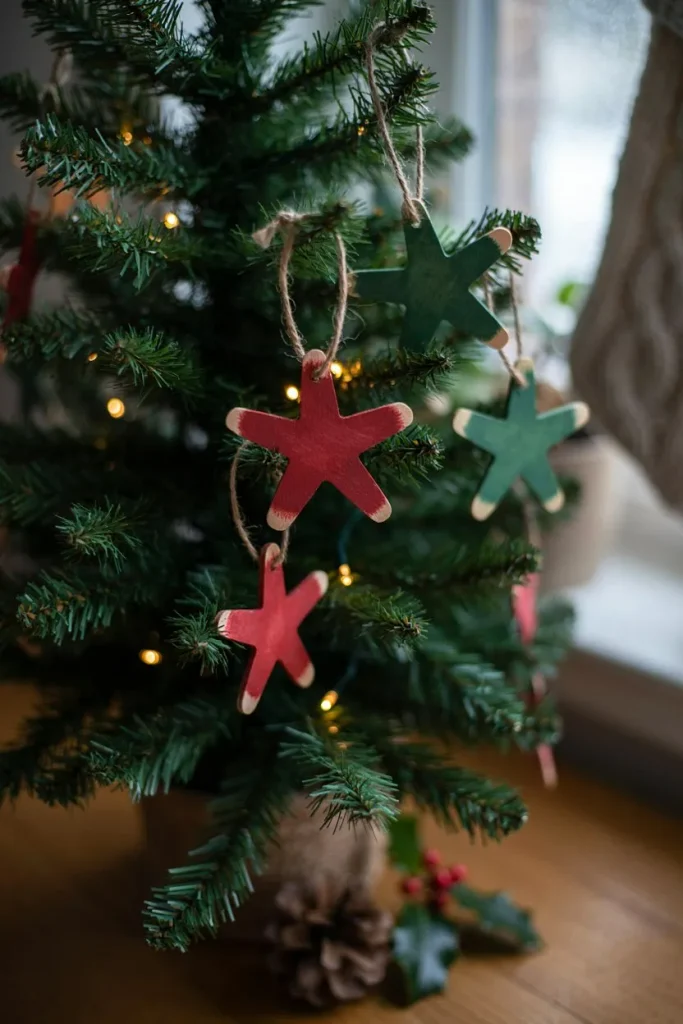
Popsicle stick ornaments are one of the easiest diy christmas decorations to make with kids, since the materials are simple and the assembly requires very little skill. I’ve seen this project work well even for preschool-aged children, with adults handling the gluing step while kids focus on painting and decorating. Because popsicle sticks are inexpensive and widely available, this is a great option for making a large batch at once for a classroom or larger family gathering. The natural wood grain adds a rustic charm even under a simple coat of paint. These ornaments also make sweet, personalized keepsakes when a child’s name or the year is written on the back.
10. Twine Wrapped Letters
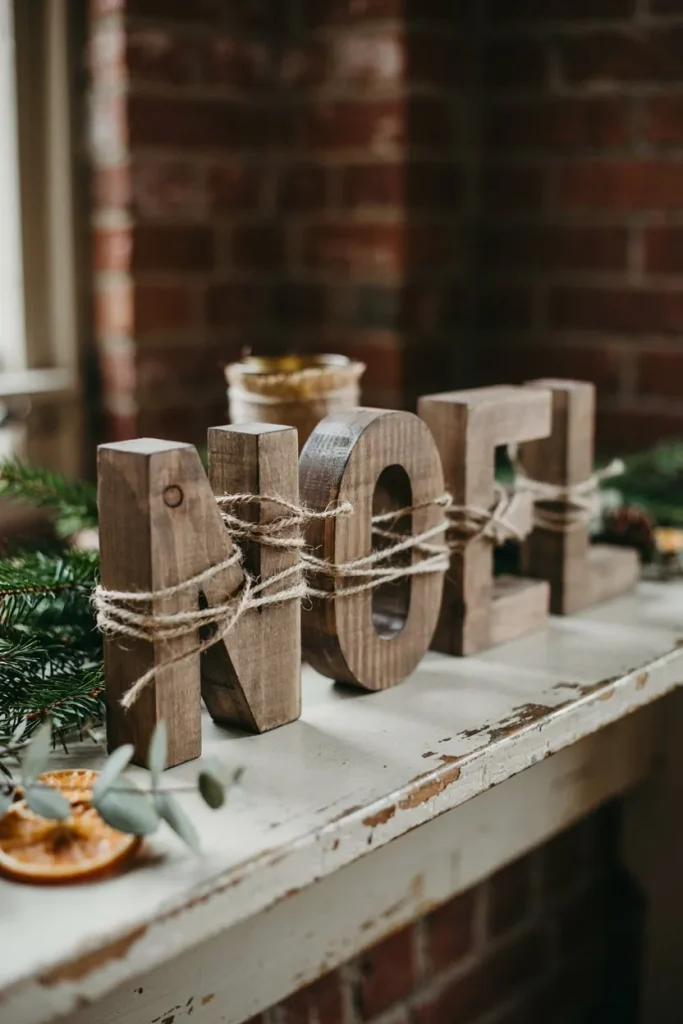
What You’ll Need
- Wooden letter cutouts
- Natural twine
- Hot glue gun
- Scissors
How to Make It
- Secure the end of the twine to the back of the letter with glue.
- Wrap twine tightly around the letter, working section by section.
- Add small dabs of glue periodically to keep twine in place.
- Continue wrapping until the entire letter is covered.
- Secure the final end and trim excess twine.
- Arrange letters together on a mantel or shelf.
Twine-wrapped letters are a simple way to spell out a festive word using nothing more than wooden cutouts and natural string. I’ve noticed that this project fits especially well into farmhouse-style homes, where natural textures like twine and unfinished wood are already part of the overall aesthetic. As one of the more customizable diy christmas decorations on this list, the letters can spell anything from “NOEL” to a family name, making the project genuinely personal. Wrapping takes a bit of patience but no special skill, making it accessible for most crafters. Displayed on a mantel or shelf, these letters become a lasting decoration that can be reused every year.
11. Fabric Scrap Ornaments
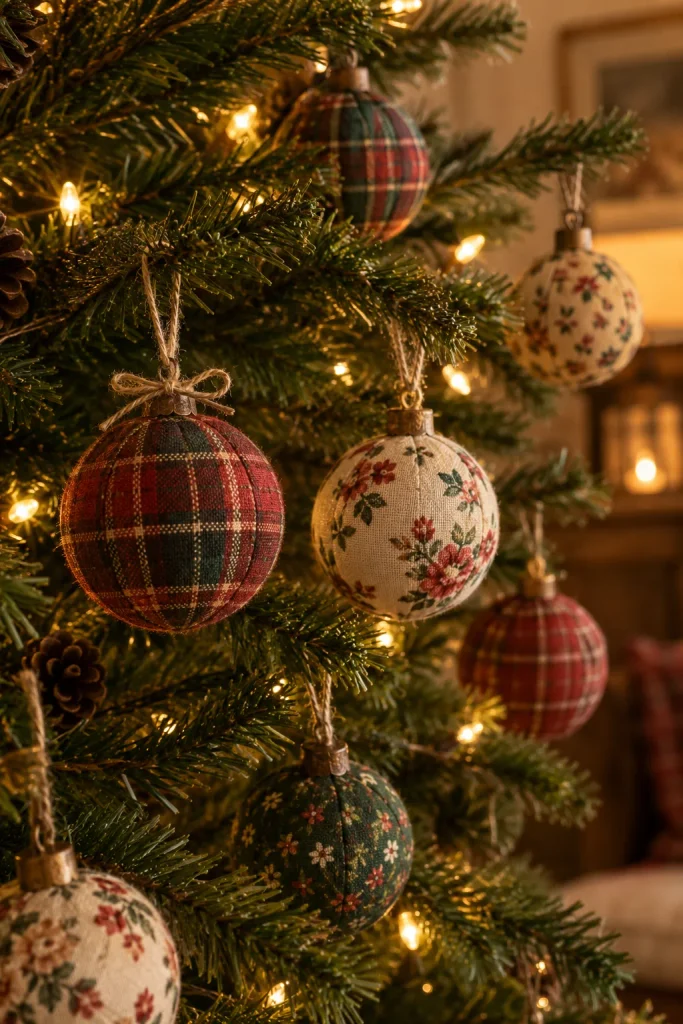
What You’ll Need
- Foam balls
- Fabric scraps
- Fabric glue or hot glue
- Scissors
- Ribbon for hanging
How to Make It
- Cut fabric scraps into small, irregular pieces.
- Apply a thin layer of glue to the foam ball surface.
- Press fabric pieces onto the ball, overlapping edges slightly.
- Continue until the entire ball is covered.
- Trim any excess fabric at the edges.
- Glue a ribbon loop to the top for hanging.
Fabric scrap ornaments are a wonderful way to repurpose leftover material from other sewing or craft projects into genuinely useful diy christmas decorations. I’ve tried this project using scraps from old clothing, and it adds a sentimental quality that store-bought ornaments simply can’t replicate. Mixing patterns like plaid, floral, and solid fabrics creates a layered, cottage-style look that feels collected rather than uniform. This project works well for using up small fabric pieces too tiny for other projects but too nice to throw away. Because foam balls are lightweight, these ornaments hang safely even on thinner tree branches without causing any drooping.
12. Bottle Brush Tree Cluster
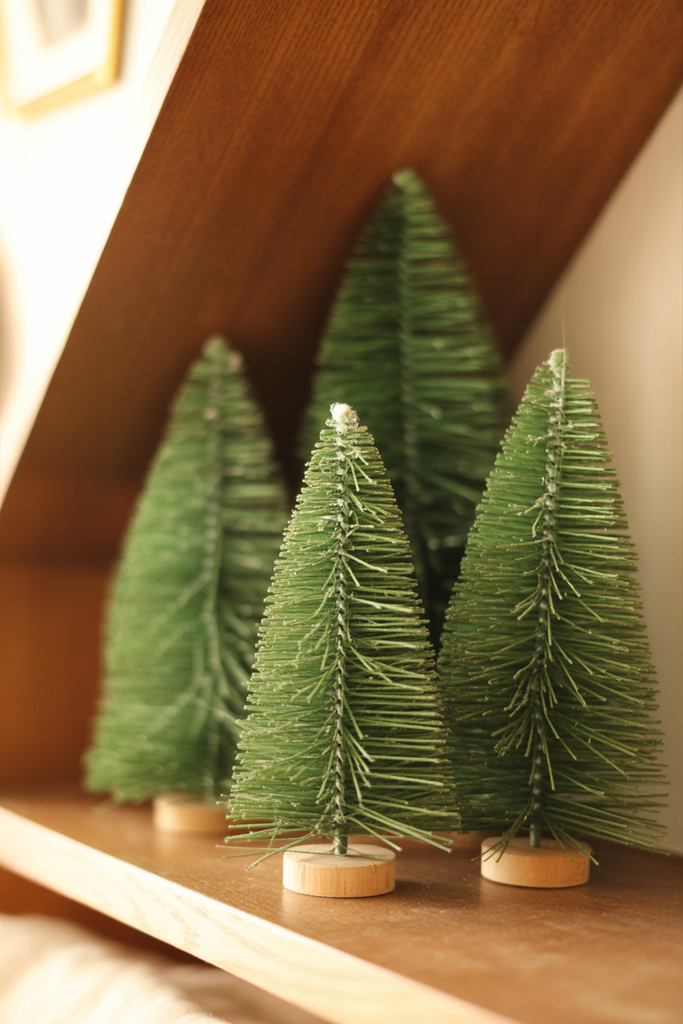
What You’ll Need
- Green bristle brush wire or pipe cleaners
- Wooden dowels or skewers
- Small wooden base or spool
- Hot glue gun
- Optional: white paint for a snowy effect
How to Make It
- Wrap green bristle wire tightly around a wooden dowel.
- Trim the bristles into a rough cone shape as you go.
- Secure the base of the dowel into a small wooden spool with glue.
- Trim and shape bristles further for a more refined tree silhouette.
- Optionally dab white paint on the tips for a snow-dusted look.
- Group several trees of different heights together for display.
A cluster of handmade bottle brush trees brings a whimsical, vintage charm that mirrors decorations popular decades ago, now trending again this season. I’ve seen this style work particularly well grouped in odd numbers, three or five, rather than displayed as a single tree alone. As one of the more detailed diy christmas decorations on this list, this project takes a bit more patience, but the nostalgic result is worth the extra effort involved. Varying the heights of each tree within the cluster adds visual interest and a more natural, forest-like arrangement. These trees also store compactly, making them easy to keep and reuse for many holiday seasons.
13. Ribbon Wrapped Candles
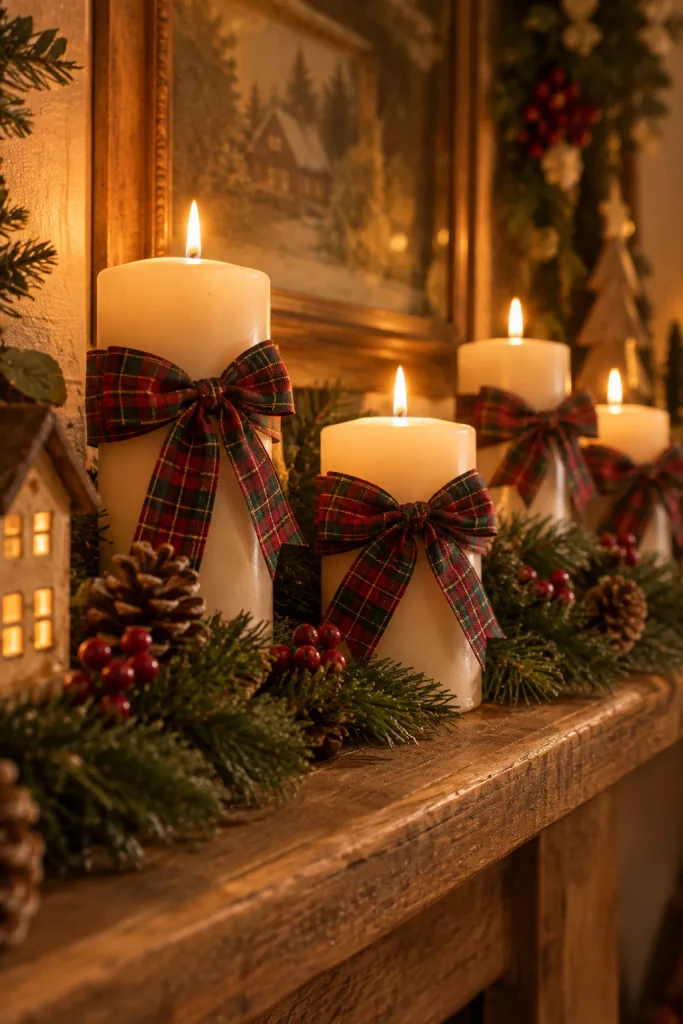
What You’ll Need
- Pillar candles
- Plaid or patterned ribbon
- Scissors
- Hot glue gun (low temperature)
How to Make It
- Measure ribbon length needed to wrap around the candle base.
- Apply a small dot of glue to secure the ribbon’s starting point.
- Wrap ribbon around the candle, keeping it straight and even.
- Secure the end with another small dot of glue.
- Tie a small bow using leftover ribbon and glue it on top.
- Repeat for additional candles in varying heights.
Ribbon-wrapped candles are a quick way to dress up plain pillar candles into genuinely festive diy christmas decorations without much time or skill required. I’ve noticed that using a low-temperature glue gun prevents the ribbon from scorching or melting too close to the wax, which matters more than people expect. This project works beautifully grouped in varying heights down the center of a table or along a mantel. Choosing a classic plaid or traditional red-and-white ribbon keeps the look timeless rather than tied to one specific trend. Because the ribbon is glued rather than melted directly onto the candle, it can easily be removed and reused on a fresh candle later.
14. Wood Slice Ornaments

What You’ll Need
- Wood slices (pre-cut or from a craft store)
- Acrylic paint
- Fine paintbrush
- Drill or awl for a hanging hole
- Twine for hanging
How to Make It
- Sand the wood slice surface lightly if needed.
- Drill or poke a small hole near the top edge.
- Paint a simple design, like a tree, snowflake, or star.
- Let the paint dry completely.
- Add a clear sealant coat if desired for durability.
- Thread twine through the hole and tie for hanging.
Wood slice ornaments let the natural grain of the wood become part of the design itself, something most manufactured ornaments can’t offer. I’ve tried painting simple, minimal designs on these slices, and the contrast between raw wood and a small painted detail consistently looks more sophisticated than expected. This is one of the more rustic diy christmas decorations on this list, fitting naturally into farmhouse or cabin-style holiday themes. Because wood is durable, these ornaments hold up well for many seasons without chipping or fading easily. They also make thoughtful handmade gifts, especially with a name or year painted onto the back.
15. Snowflake Window Clings
What You’ll Need
- White paper or coffee filters
- Scissors
- Pencil
- Removable tape
How to Make It
- Fold paper into quarters, then fold diagonally into a triangle.
- Sketch a simple pattern along the folded edges.
- Cut along the sketched lines carefully.
- Unfold gently to reveal the finished snowflake pattern.
- Flatten under a book if the paper is creased.
- Tape snowflakes to windows using removable tape.
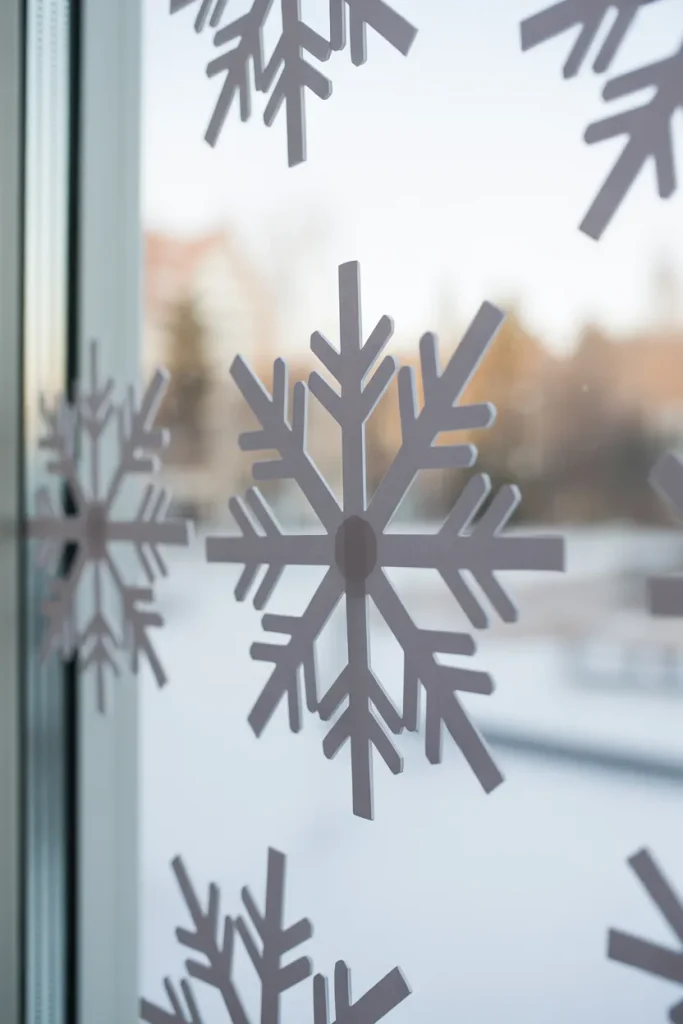
Snowflake window clings are one of the simplest and most affordable diy christmas decorations, requiring nothing more than paper, scissors, and a bit of patience. I’ve noticed that using coffee filters instead of regular paper creates a softer, more delicate look once light shines through them. This project works well as a relaxing solo activity or a fun group activity for kids on a snowy afternoon indoors. Because no two folded and cut snowflakes turn out exactly alike, each one adds a unique, handmade touch to the window display. Once the season ends, these paper snowflakes store flat and can easily be reused again next year.
Conclusion
Handmade decorations bring something to the holidays that store-bought pieces simply can’t replicate. From twine-wrapped letters to painted mason jar lanterns, these diy christmas decorations prove that a little time and a few simple materials can create something genuinely meaningful. I’ve seen how a single handmade ornament, kept and reused year after year, ends up carrying more sentimental value than an entire box of purchased decor. Pick one or two projects that fit your skill level, gather your supplies, and give one a try this week. Save this article to Pinterest so you can come back to it, and share it with anyone who loves a handmade holiday as much as you do.